Hibernate: sample application with MySQL
As a continuation of the previous article, I want to demonstrate a simple example of Hibernate usage. I will show you the basic principles of Hibernate functionality. The article will cover annotation based configurations. For the tutorial you need to have installed an IDE (e.g. Eclipse), Maven, m2e plugin, MySQL.
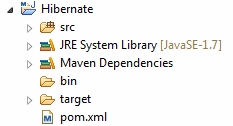
At the beginning I create a simple Java project and convert it to maven project. Then in the pom.xml I add these dependencies:
		<dependency>
			<groupId>org.hibernate</groupId>
			<artifactId>hibernate-core</artifactId>
			<version>4.1.9.Final</version>
		</dependency>
		<dependency>
			<groupId>mysql</groupId>
			<artifactId>mysql-connector-java</artifactId>
			<version>5.1.22</version>
		</dependency>
Hibernate is an essential library in the tutorial. MySQL connector is needed in order to establish connection with the database.
As the result you will get something like this:
Now it’s a good time to think about the java classes which are required for the demonstration of Hibernate functionality. The example will be based on interaction with one database table. Hence I will create one POJO class to represent the database table and I’m going to annotate it. One Java class is needed for generation of SessionFactory. And in the end I suggest you create several classes for the demonstration of CRUD operations using Hibernate.
But firstly I will create a hibernate.cfg.xml in the src folder:
<?xml version="1.0" encoding="UTF-8"?>
<!DOCTYPE hibernate-configuration PUBLIC
		"-//Hibernate/Hibernate Configuration DTD 3.0//EN"
		"http://hibernate.sourceforge.net/hibernate-configuration-3.0.dtd">
<hibernate-configuration>
    <session-factory>
        <property name="hibernate.connection.driver_class">com.mysql.jdbc.Driver</property>
        <property name="hibernate.connection.username">root</property>
        <property name="hibernate.connection.password">root</property>
        <property name="hibernate.connection.url">jdbc:mysql://localhost:3306/hibnatedb</property>
        <property name="hibernate.dialect">org.hibernate.dialect.MySQLInnoDBDialect</property>
    	<property name="show_sql">true</property>
    	<property name="connection.pool_size">1</property>

    	<mapping class="com.hib.entities.Student"></mapping>

    </session-factory>
</hibernate-configuration>
I hope the code snippet above doesn’t need any explanation because it’s really clear and self commented. But as usual you are welcome to ask any question in the comments.
Afterwards let’s create HibernateUtil class. Its destination is to be a helper class, which contains an initialization of the SessionFactory.
package com.hib.init;

import org.hibernate.SessionFactory;
import org.hibernate.cfg.Configuration;
import org.hibernate.service.ServiceRegistry;
import org.hibernate.service.ServiceRegistryBuilder;

public class HibernateUtil {

	private static final SessionFactory sessionFactory;
	private static final ServiceRegistry serviceRegistry;

	static {
		Configuration conf = new Configuration();
		conf.configure();
		serviceRegistry = new ServiceRegistryBuilder().applySettings(conf.getProperties()).buildServiceRegistry();
		try {
			sessionFactory = conf.buildSessionFactory(serviceRegistry);
		} catch (Exception e) {
			System.err.println("Initial SessionFactory creation failed." + e);
			throw new ExceptionInInitializerError(e);
		}
	}

	public static SessionFactory getSessionFactory() {
		return sessionFactory;
	}
}
Here occurs initialization of SessionFactory based on hibernate.cfg.xml; You can notice that static block is present because often just one SessionFactory object is used within application.
Here is a code snippet for the creation of table in the database:
CREATE TABLE `student` (
  `id` int(11) NOT NULL AUTO_INCREMENT,
  `firstname` varchar(20) NOT NULL,
  `age` int(2) NOT NULL,
  PRIMARY KEY (`id`)
) ENGINE=InnoDB AUTO_INCREMENT=2 DEFAULT CHARSET=utf8;
This database table, as you remember must have an appropriate POJO class.
package com.hib.entities;

import javax.persistence.Entity;
import javax.persistence.GeneratedValue;
import javax.persistence.Id;
import javax.persistence.Table;

@Entity
@Table
public class Student {

	@Id
	@GeneratedValue
	private Integer id;

	private String firstName;
	private Integer age;

	public Student() {};

	public Student(Integer id, String firstName, Integer age) {
		this.id = id;
		this.firstName = firstName;
		this.age = age;
	}

        //Here you need to generate getters and setters

}
Pay your attention to the fact that I have imported annotations from javax.persistence.* package, that’s because we can work with Hibernate through JPA. Notice that the class above is figured in the hibernate.cfg.xml. I recommend you read more about these annotations in the official documentations, there you will find additional important information about them.
It’s time to perform CRUD operations with all this stuff.
package com.hib.demo;

import org.hibernate.Session;
import org.hibernate.SessionFactory;

import com.hib.entities.Student;
import com.hib.init.HibernateUtil;

public class DemoFirst {

	public static void main(String[] args) {

		SessionFactory sessionFactory = HibernateUtil.getSessionFactory();
		Session session = sessionFactory.openSession();
		session.beginTransaction();

		Student student = new Student();
		student.setFirstName("Bob");
		student.setAge(26);

		session.save(student);
		session.getTransaction().commit();

		session.close();

	}
}
Run this class several times and add different students to the table.
After that try to run this class:
package com.hib.demo;

import java.util.List;

import org.hibernate.Session;
import org.hibernate.SessionFactory;

import com.hib.entities.Student;
import com.hib.init.HibernateUtil;

public class DemoSecond {

	public static void main(String[] args) {

		SessionFactory sessionFactory = HibernateUtil.getSessionFactory();
		Session session = sessionFactory.openSession();

		List<Student> students = session.createQuery("from Student").list();

		session.close();

		for (Student st : students) {
			System.out.println(st.getId()+". "+st.getFirstName()+" "+st.getAge());
		}
	}
}
In this way you can perform select statements using Hibernate.
To update statements is not harder than previous operations:
package com.hib.demo;

import org.hibernate.Session;
import org.hibernate.SessionFactory;

import com.hib.entities.Student;
import com.hib.init.HibernateUtil;

public class DemoThird {

	public static void main(String[] args) {

		SessionFactory sessionFactory = HibernateUtil.getSessionFactory();
		Session session = sessionFactory.openSession();
		session.beginTransaction();

		Student student = (Student) session.get(Student.class, 1);
		student.setFirstName("Zet");
		student.setAge(45);

		session.update(student);
		session.getTransaction().commit();

		session.close();
	}
}
In the end it’s time to try delete operation:
package com.hib.demo;

import org.hibernate.Session;
import org.hibernate.SessionFactory;

import com.hib.entities.Student;
import com.hib.init.HibernateUtil;

public class DemoFourth {

	public static void main(String[] args) {

		SessionFactory sessionFactory = HibernateUtil.getSessionFactory();
		Session session = sessionFactory.openSession();
		session.beginTransaction();

		Student student = (Student) session.get(Student.class, 1);

		session.delete(student);
		session.getTransaction().commit();

		session.close();

	}
}
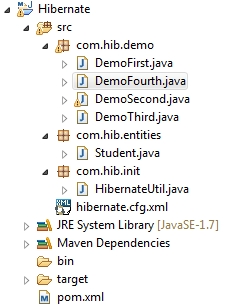
End view of the project:
Summary
Hibernate is very useful, it takes plenty of work on itself. The main aim of Hibernate is to make development more easy and convenient. You can’t imagine all range of Hibernate functionality from this post, but it’s a good point from which you can start your learning.