Spring Boot & Swagger UI

I have not developed Spring web applications from scratch for one year and maybe this period of time will be even longer if I was not involved in training for QA automation engineers. Due to this reason I have developed a sample REST-applications. Everything were pretty familiar to me except Swagger. So I’m going to describe my new acquired experience with Spring Boot and Swagger UI.
foreword
First of all I need to mention that I’ve used Spring IO. Yes-yes, that was a first time when I’ve used Spring not as a popular java framework but as platform. It was really exciting. Comparing with my previous Spring experience, in Spring IO configuration process and setup of project become more easy and fast.
According to topic of training the sample web application need to have simple business logic. I decided to develop app where landlords (realtors) can manage their realty (apartments). Hence user of app can perform CRUD operations with landlords and apartments.
Now when you know in what context I have to use swagger I can omit the rest of story about the application and training and jump to main topic of the article – Swagger and Spring Boot integration.
Spring Boot + Swagger
In order to plug Swagger to a web Spring application you need to add dependency to a build file (Maven or Gradle). It’s very simple and clear described on official Git page.
After this you can add a separate configuration java class which is responsible for Swagger:
import com.mangofactory.swagger.configuration.SpringSwaggerConfig;
import com.mangofactory.swagger.models.dto.ApiInfo;
import com.mangofactory.swagger.plugin.*;
import org.springframework.beans.factory.annotation.Autowired;
import org.springframework.boot.autoconfigure.EnableAutoConfiguration;
import org.springframework.context.annotation.*;

@Configuration
@EnableSwagger
@EnableAutoConfiguration
public class SwaggerConfig {

    private SpringSwaggerConfig springSwaggerConfig;

    @Autowired
    public void setSpringSwaggerConfig(SpringSwaggerConfig springSwaggerConfig) {
        this.springSwaggerConfig = springSwaggerConfig;
    }

    @Bean
    public SwaggerSpringMvcPlugin customImplementation() {
        return new SwaggerSpringMvcPlugin(this.springSwaggerConfig)
                //This info will be used in Swagger. See realisation of ApiInfo for more details.
                .apiInfo(new ApiInfo(
                        "SmartMe education API",
                        "This app is for education, training purpose. It represents model of landlords and apartments for rent",
                        null,
                        null,
                        null,
                        null
                ))
                //Here we disable auto generating of responses for REST-endpoints
                .useDefaultResponseMessages(false)
                //Here we specify URI patterns which will be included in Swagger docs. Use regex for this purpose.
                .includePatterns("/landlords.*");
    }

}
After the configuration file is done you can continue with Controllers. By the way you need to put swagger config in area of scan by Spring Boot Application class.
@Api(basePath = "/landlords", value = "Landlords", description = "Operations with Landlords", produces = "application/json")
@RestController
@RequestMapping(value = "/landlords", produces = MediaType.APPLICATION_JSON_VALUE)
public class LandLordController {

    private static final Logger logger = LoggerFactory.getLogger(LandLordController.class);

    @Autowired
    private LandLordService landLordService;

    @RequestMapping(method = RequestMethod.POST,
            consumes = MediaType.APPLICATION_JSON_VALUE)
    @ResponseStatus(HttpStatus.CREATED)
    @ApiOperation(value = "Create new Landlord", notes = "Creates new Landlord")
    @ApiResponses(value = {
            @ApiResponse(code = 400, message = "Fields are with validation errors"),
            @ApiResponse(code = 201, message = "") })
    public LandLord createLandLord(@Valid @RequestBody LandLordDTO landLordDTO) {
        logger.info("LandLord DTO is: "+landLordDTO);
        LandLord landLord = new LandLord(landLordDTO);
        landLordService.create(landLord);
        return landLord;
    }

//Other endpoints are omitted
}
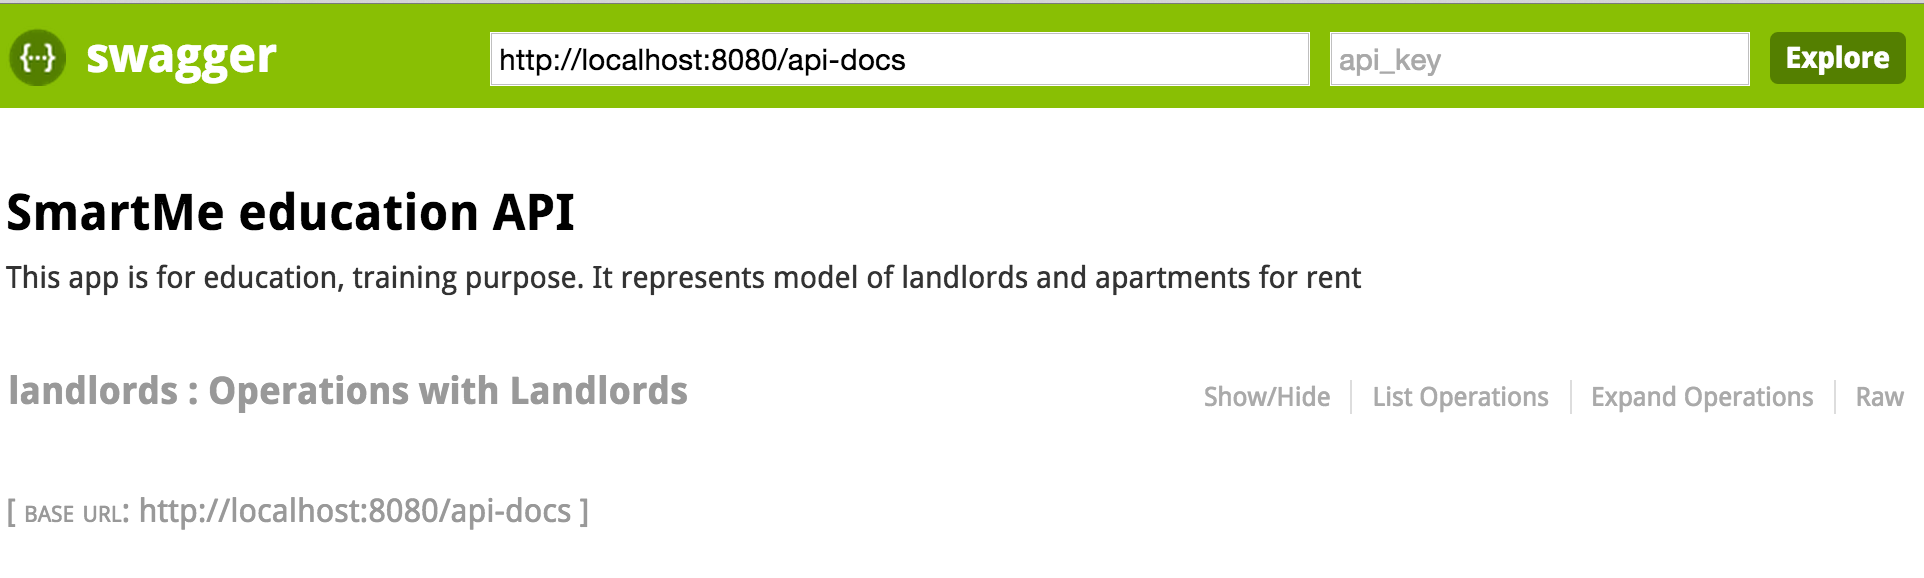
That’s all you need to have a documentation of your API in JSON format. To check it, start your application and go to http://localhost:8080/api-docs
Spring Boot + Swagger UI
Well documentation of API in JSON format is good but not so useful for other team members, e.g. front-end developers. So we have to plug UI. Download swagger ui from its official git repo. After that extract it and copy dist directory and paste it in folder /public or /static or /resources located in src/java/resources.
Now rename dist in swagger. Open index.html and change JavaScript code, it should look like:
$(function () {
      var url = window.location.search.match(/url=([^&]+)/);
      if (url && url.length > 1) {
        url = decodeURIComponent(url[1]);
      } else {
        url = "/api-docs";
      }
//rest of code...
That is it. Now relaunch the application and navigate to
http://localhost:8080/swagger/index.html
You have to see something like this: