JD – Java decompiler
Every java developer faces with a situation when he needs to see the source of some java class. But not always libraries are completed with the source code, and you can’t see the sources by simply clicking on the “F3” button. So in such situations you need to use decompiler… How to use java decompiler in Eclipse? This post gives an answer on the question.
In this tutorial I will show you how to install in Eclipse one of the most popular java decompilers – JD. Everything below will be presented as an instruction describing the steps, you need to, in order to complete installation and activation of JD decompiler. I will perform all actions for Eclipse (JUNO) Java EE IDE for Web Developers.
- In main menu select Help > Install new software…
- Click on the [Add…] button and input in the pop-up form Name=”JD decompiler”, Location=”http://jd.benow.ca/jd-eclipse/update”; Click on the [Ok] button.
- Select from the “Work with” drop-down list just created item – JD decompiler…
- Click on the [Select All] button and click on the [Next >] button.
- Go through the installation wizard and in the end of it you will need to restart the Eclipse.
That’s it, now you have installed JD decomplier in your Eclipse. But what if JD decompiler doesn’t work? In order to fix this you just need to perform the following steps:
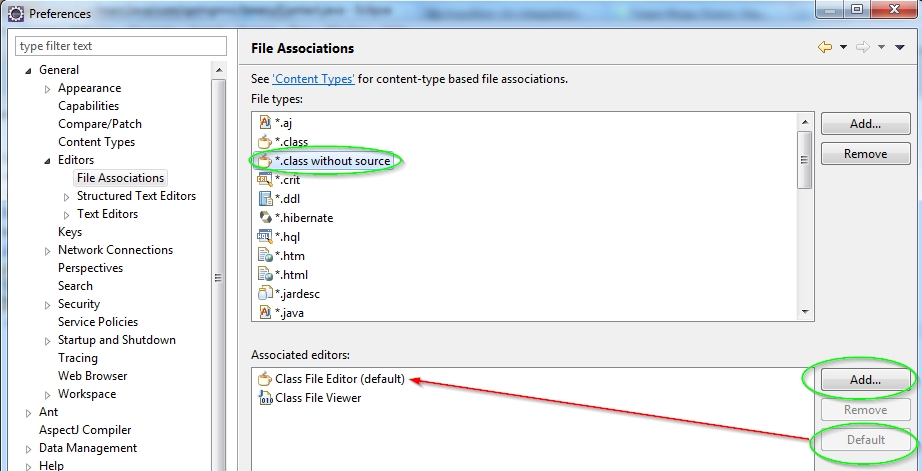
- In the main menu select Window > Preferences
- General > Editors > File Associations
- Select “*.class without source”, add Class File Editor and make it default.
To check that everything is OK now, place the cursor on the class which doesn’t have source code and press the “F3” button. That’s all.